| With our 2nd anniversary coming up I decided to do a little DIY project again. Sticking to the traditional gifts for each anniversary I had to get creative with: Cotton. I'm so happy I came across string art as it involves plenty of proper 'do it yourself', crafty steps. With many beautiful images for inspiration I was so excited! Warning: Be prepared for hours of work! You will however walk away with precision hammering techniques, plenty of left over paint and a pretty piece of art which you can be proud of. | 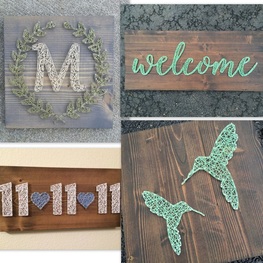 |
Tips and tricks for creating string art
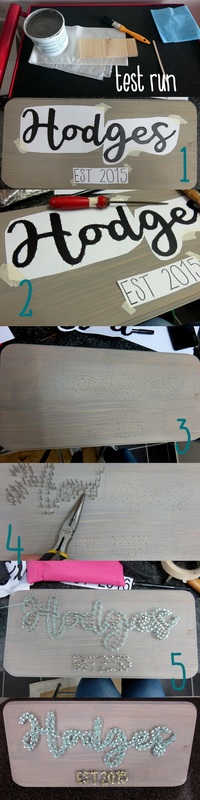 | Supplies: Piece of wood (I had someone create a decorative edge on mine) Paint - Midas Envirolite Woodwash R50 for 1 litre Nails - Builders Warehouse panel pins 1.6mm x 25mm 200g String - embroidary cotton works well Printed out design Hammer Long nose pliers Ice pick type of tool Super glue Tips and method: - Decide on a design. Solid basic objects would have been a better idea for my first attempt. Print the design and use a spare piece of wood to do a test run (paint, nails, string etc.). - Once you feel confident paint your final piece of wood and leave to dry. - Roughly cut out your design and use masking tape to secure your design onto the wood. (Step 1) - Use a pencil to draw dots as a guide for your nails. Spacing is very important and so is the type of nails you use. You should have a good idea of spacing after your test run. (Step 2) - Use the ice pick tool and hammer through your template where you have drawn your dots. Once you have completed your entire design remove the paper. If you feel confused use a pencil and very lightly connect the dots to reveal your design. (Step 3) -Then the hard part... Hammer a nail into every 'guide hole' created in the previous step. Use long nose pliers to hold the base of the nail while hammering it in. This will help with keeping nails straight and all fingers intact (Step 4) - To start stringing tie a knot around a nail and go from there. Experiment with different techniques but always secure the string by go around the entire head of the nail at least once. To create an anchor every now and then go around a nail twice. - I started by creating a double outline (Step 5) and then filling it in. - Once you are finished with a section use a tiny bit of super glue to secure the end of your piece of string. Try not to do this too often as you can not really use that nail again. |
I love the final product and will add hooks on the front in order to use it as a key holder at my front door one day. This is really a great project and the different options are endless! The only change I would have made to my piece is the EST. 2015 at the bottom. Try not using a very narrow font and instead space your letters out. My 'Hodges' was a combination of two fonts: Pacifico and Magnolia Sky both free from dafont.com.
If you need any more tips or advice please leave a comment below and I would be happy to help.
If you need any more tips or advice please leave a comment below and I would be happy to help.